How To Verify Your Domain For Meta Ads
This guide walks through the steps outlined by Meta to verify domain(s)
In light of changes coming to Meta advertising due to Apple's iOS 14 update, Meta is requiring all advertisers on the Meta platform to verify the domains associated with their respective Meta Pages. Doing so will allow advertisers to maintain full functionality within the platform.
- For more information on this, Orbee has published an article that provides a full overview of changes coming with Meta Advertising & Apple’s iOS 14 and how Orbee is guiding our clients through this transition as seamlessly as possible.
*An internal IT specialist or someone with access to your domain registrar (Go Daddy, Google Domains) will be needed to complete the domain verification process.
To prep for these changes, use the following steps to verify your Facebook domain in preparation for iOS 14:
-
Navigate to Meta Business Settings using the following link: https://business.facebook.com/settings/
-
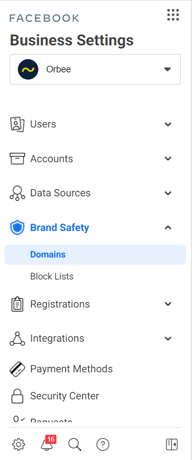
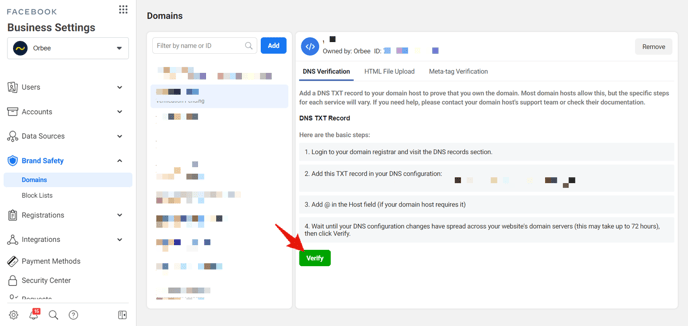
Then, find and click the Brand Safety tab on the sidebar and select Domains
-
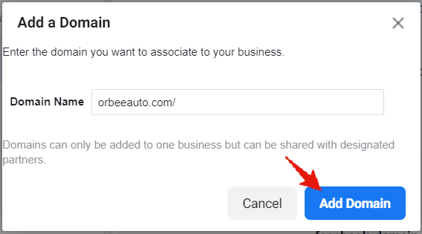
If your domain is not already listed, click the Add button

-
Enter your domain, then click Add Domain
-
- There are 3 methods (DNS Verification, HTML File Upload, or Meta-tag Verification) that can be used to verify your domain, however we recommend DNS Verification, since it has been found to be the most simple option. Follow the steps outlined by Meta
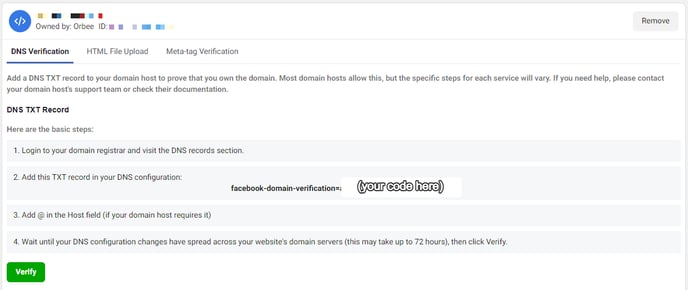
- Use this article if you need help editing your domain registrar - DNS Verification
-
After verification steps have been executed, click Verify
-
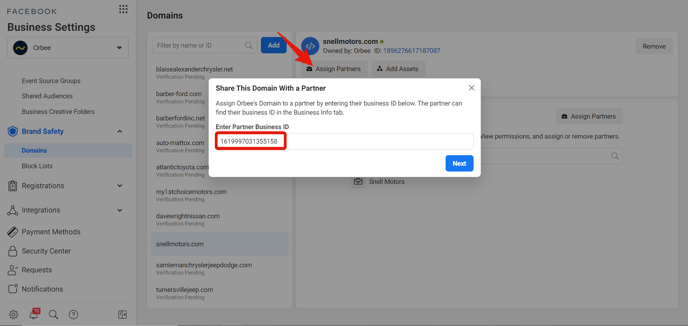
Your domain has been verified! Now, the last thing to do is grant Orbee Partner access. Click Assign Partners, then enter Orbee’s Business ID: 1619997031355158
