Getting Started: Email Marketing Success with Orbee
This guide will walk you through the process of setting up and deploying effective email marketing campaigns using the Orbee platform.
Prepare Your Foundation
- Establish a Whitelabel: Configure your domain to optimize email deliverability and ensure your emails arrive in your recipients' inboxes.
- Organize Your Audience: Create subscription groups to categorize subscribers (e.g., Sales, Service) and track unsubscribes effectively.
- Define Sender Information: Set up sender groups to specify the "From" address and manage replies for your campaigns.
Build Your Campaign
- Import Your Contacts: Upload your subscriber list in the required CSV UTF-8 format, ensuring accurate data for targeted outreach.
- Design Engaging Emails: Utilize Orbee's editor to create visually appealing and informative email templates, optimizing them for different email platforms and devices.
Launch and Monitor
- Assemble Campaign Components: Combine your prepared elements (whitelabel, sender group, subscriber list, and template) to create your email campaign.
- Test and Schedule: Send test emails to verify links, formatting, and content, then schedule your campaign for the optimal send time.
Step-By-Step Setup
1. Set Up Your Whitelabel (DNS Record)
A whitelabel helps improve the deliverability of your emails by making them appear to come from your own domain. Here's how to set it up:
- Go to Whitelabels: In the Orbee platform, navigate to the "Marketing" tab and click on the "Whitelabels" tab under "Settings".
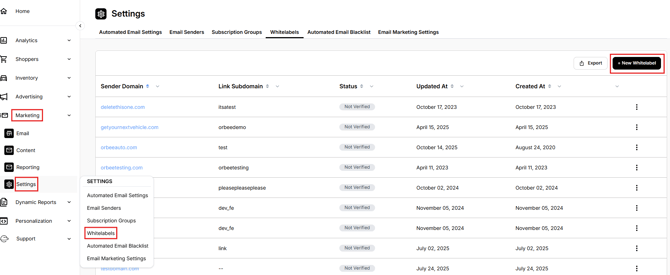
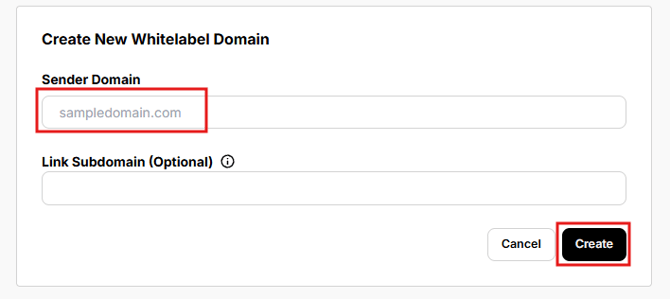
- Create a New Whitelabel: Click the "+ New Whitelabels" button and enter your desired Domain. Leave the "Link Subdomain" blank.
- Create: Click the blue "Create" button.
- Set Up DNS: You'll need to configure DNS records with your domain provider. Orbee provides instructions on how to do this.
- Send Instructions: Click the three vertical dots next to your whitelabel and select "Send instructions" to email the setup guide to yourself or your IT team.

- Verify DNS: Once you've configured the DNS records, click the three vertical dots again and select "Verify." Orbee will confirm if the setup is correct.
2. Create Subscription Groups
Subscription groups help you organize your audience and track unsubscribes for different types of emails (e.g., sales, service, etc.).
- Navigate to Subscription Groups: In the "Marketing" tab, under "Settings", click "Subscription Groups".
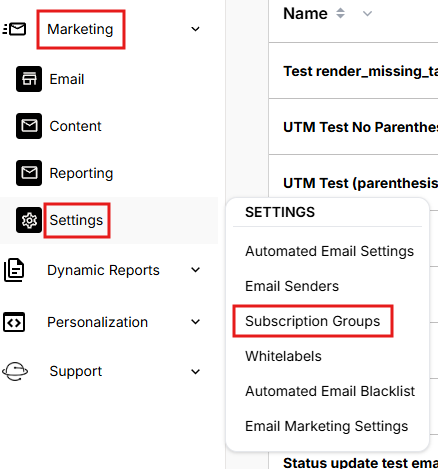
- Create a New Group: Click "+ New Group" and give your group a name (e.g., "Sales," "Service"). Make sure the group is visible.

3. Create Sender Groups
Sender groups define the "From" address for your email campaigns.
- Navigate to Sender Groups: In the "Marketing" tab, under "Settings", click "Email Senders" and select "+ New Sender."
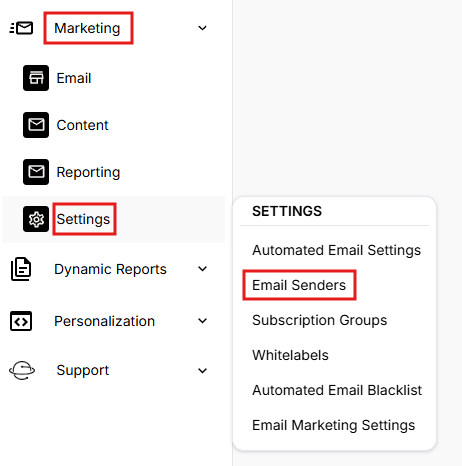
- Set Up Sender Details:
- Enter the "From" email address (this doesn't have to be a real email address).
- Provide a "Reply to" email address (this should be a real address where someone can manage replies).
- Provide an address for the email footer.
- Create: Click the button to create the sender group.
4. Upload Your Email List
- Go to Lists: In the Orbee platform, navigate to Shoppers > Audience > Lists > + Create.
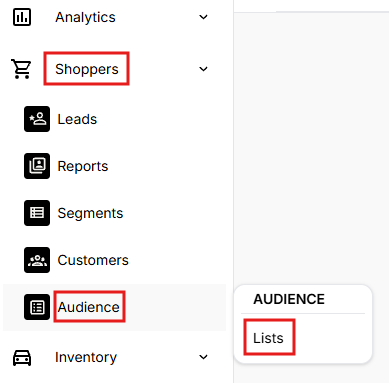
- Prepare Your List: Ensure your list is saved as a CSV UTF-8 file with the exact column headers provided in Orbee's sample file located under the gray upload box.
- Upload: Click "Upload," select the correctly formatted file, name your list, and click "Create."

- Wait for Completion: The upload process may take a few minutes. Refresh your screen to check the status. It should say "Complete" in green.

5. Create Your Email Template
- Access the Editor: Navigate to Email Marketing > Editor.
- Edit Existing Template (Optional): If you have a template, go to Templates > Edit.
- Design Your Email: Use Orbee's editor to craft your email content.
- Template Best Practices:
- General: Use a hex code finder for consistent colors and check your template in different email platforms and dark mode.
- Content: Utilize pre-made modules, ensure uniform background colors, adjust padding, add social media links, and include a footer.
- Buttons: Optimize buttons for Outlook, make them full length, consider square shapes, and add borders or shadows.
6. Create Your Email Campaign
- Start a New Campaign: Navigate to Marketing > Email > Ondemand Email > + New Campaign.

- Follow the Steps: Fill in the required information.
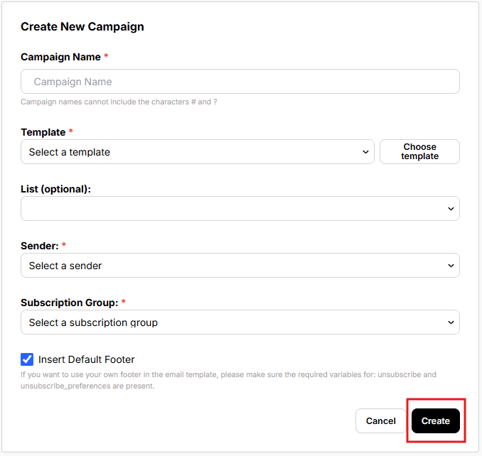
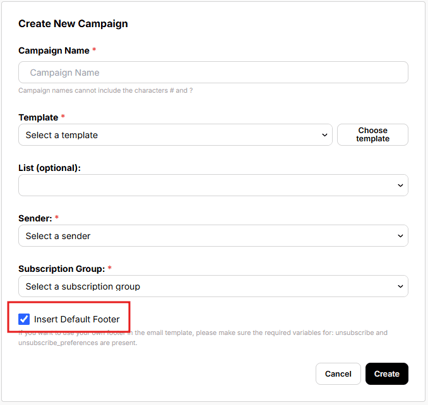
- Footer Options:
- Select "Insert Default Footer" if you haven't included a footer in your template.
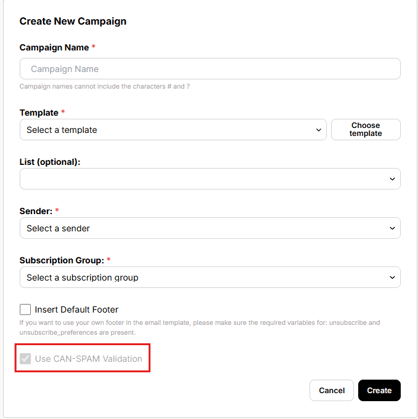
- Select "Don't Insert Default Footer" if your template already has a footer.
7. Test and Schedule Your Campaign
- Test Send: Click the three-dot menu next to your campaign and select "Test Send." Enter your email address and any others you want to include.
- Best Practices:
- Check all links in the test email.
- Ensure the subject line is compelling.
- Schedule the campaign at least 10 minutes before the desired send time.
- Verify that any UTM parameters are correct.
FAQs
- What do I choose for my DNS domain and subdomain?
- Your domain will typically match your website's domain (e.g., fordcars.com).
- Troubleshooting DNS Issues:
- If you encounter problems with DNS setup, contact your IT department or domain provider for assistance.
