How to Set Up Account-based Merge Tags
Follow along to see how you can create and test your account-based merge tags.
Step 1: Access the Merge Tag Library
Go to your merge tag library by navigating to Marketing > Content > Merge Tags.
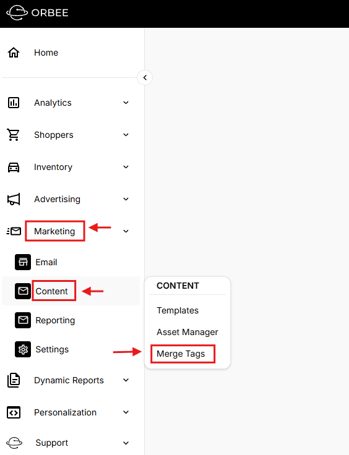
Click on + Create in the upper left corner of the page.

Step 2: Assign Key and Value
In "Key", enter a unique name for your merge tag - use letters, numbers, and underscores only, no spaces or brackets. This is the key that identifies the tag. Next, enter the corresponding value you want the merge tag to represent. This could be a website URL, an image link, or a piece of text.
Once you have input all the values, click Create.
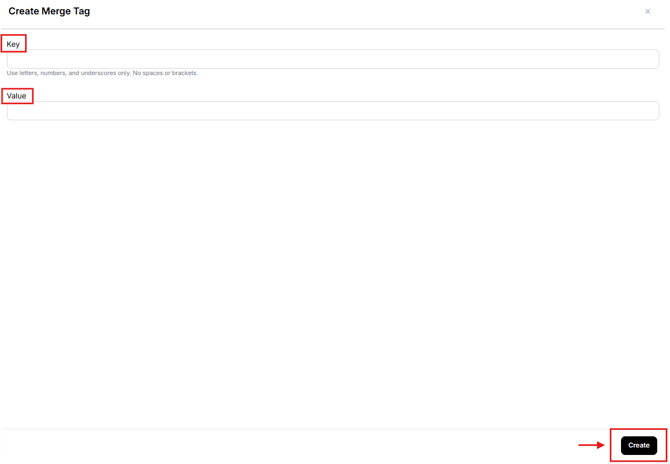
Example:

Step 3: Add the Merge Tag to Your Template
Go to Marketing > Content > Templates, hover over the template you want to edit and click on the pencil icon. For this example, let's say you created the merge tag to include in an email inviting customers to call if they need service on their vehicle.

Manually type the merge tag where you want the personalized content to appear or use the toolbar.
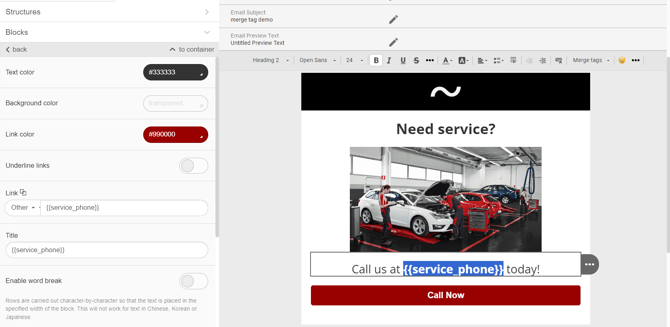
Look for the "Merge tags" dropdown menu at the top of the editor window. Select the merge tag you created from the list.

Click Save to finalize or Preview to look at your creative from the receiver's point of view before saving.

Step 4: Create a Campaign
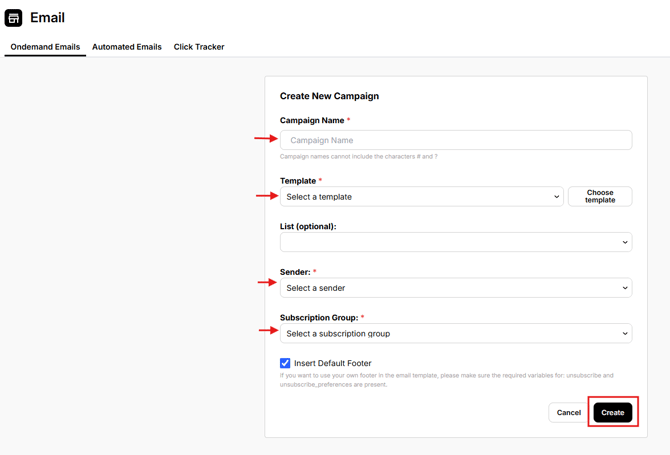
Go to Marketing > Email > Ondemand Emails > + New Campaign.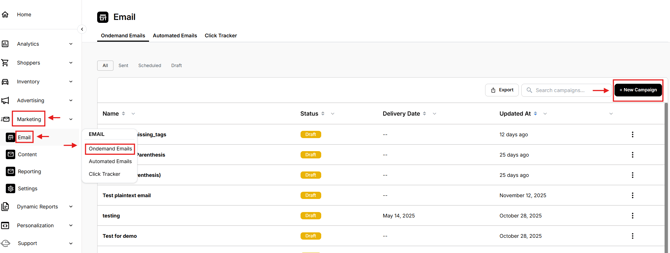
Fill in the campaign name, the template you just edited, the sender, and the subscription group. Click Create.
Step 5: Send a Test Email
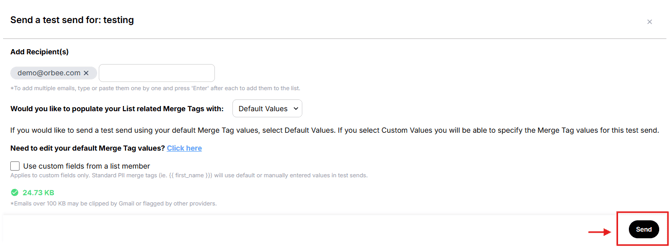
Once your campaign is set up, locate Test Send found in a dropdown menu or by clicking on the three dots in the upper-right corner of the Campaigns page.
Add Recipient(s), the email you would like the test sent to. The email address associated with your account should automatically populate. Click Send Test Send.
Step 6: Review Your Test Email
Check your inbox for the test email. Open the email and carefully check that the merge tag has been replaced with the correct information from your merge tag library. We can see that the correct phone number appears in the email, replacing the merge tag.
Note: Test sends are not an accurate reflection of inbox placement. If you don't see the test email in your inbox, check your spam folder. Click "Report not spam" and open it from your inbox to see how it will look to your recipients.
