How do I create a ZIP file?
This article will explain the steps to creating a ZIP file.
Steps to create a ZIP file
- To begin, it may help to place your desired items in a folder. You should also make sure the names of your files will help us distinguish what items they are. This will help keep the files organized and easier to keep track of.
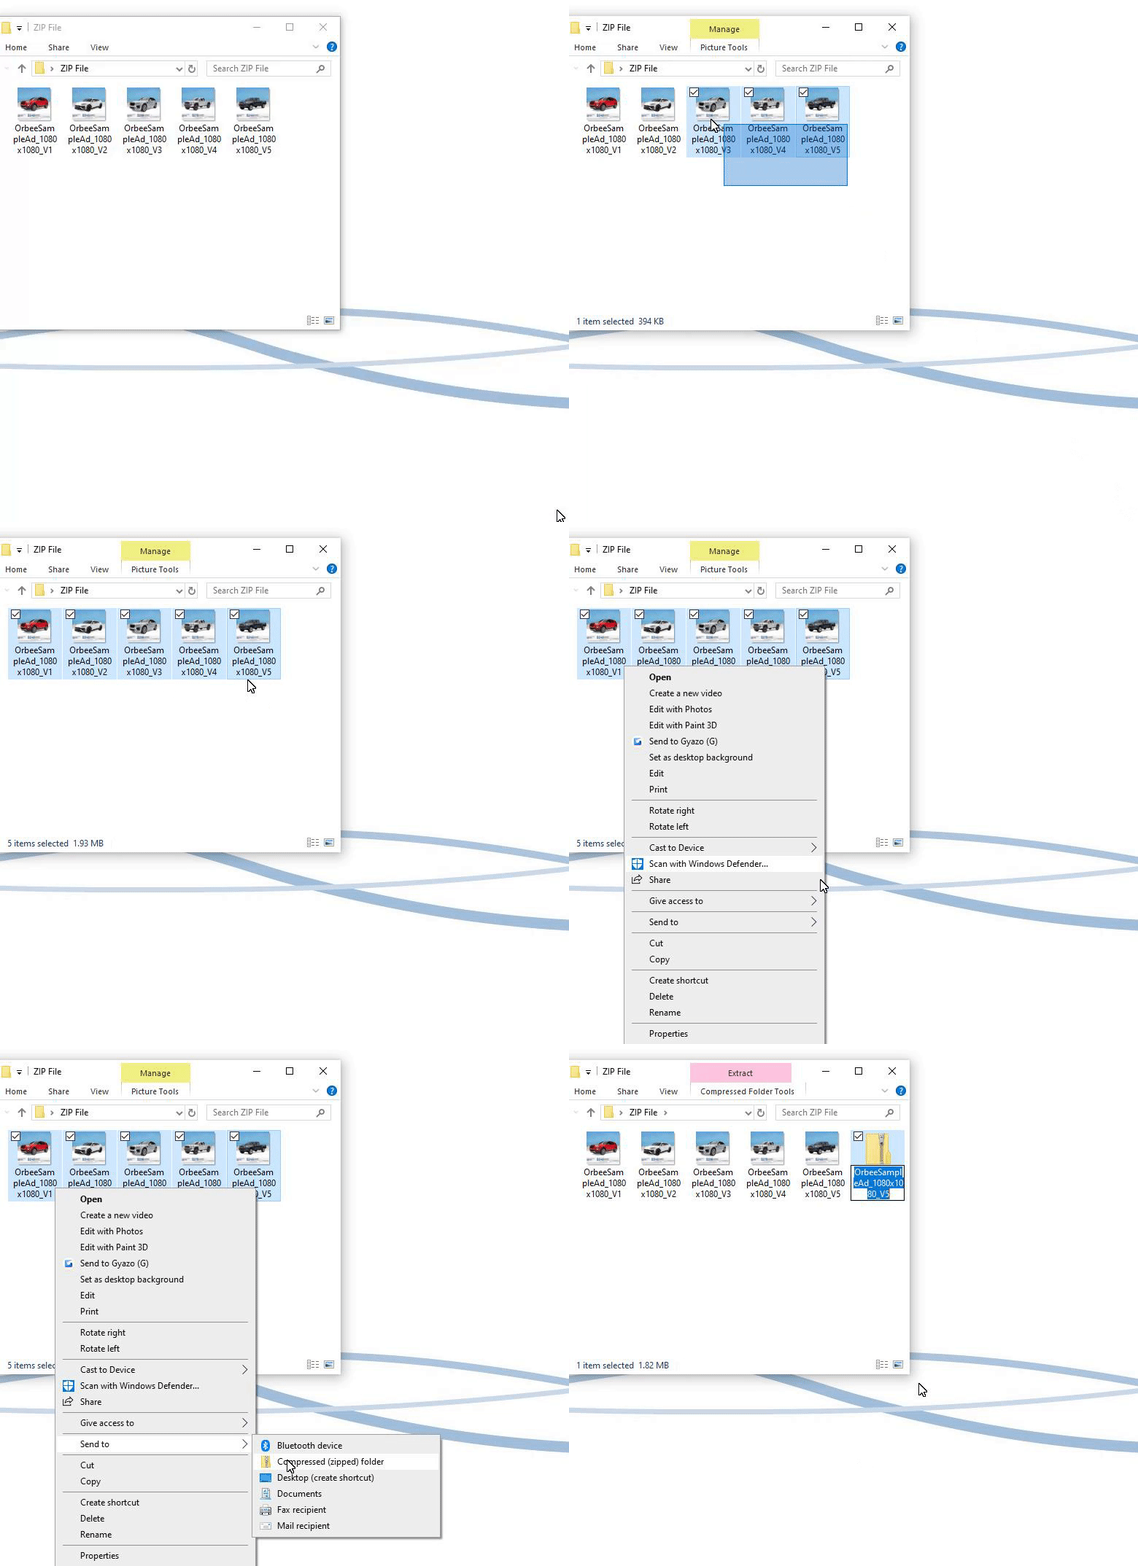
- Select the files you would like to create a ZIP file for.

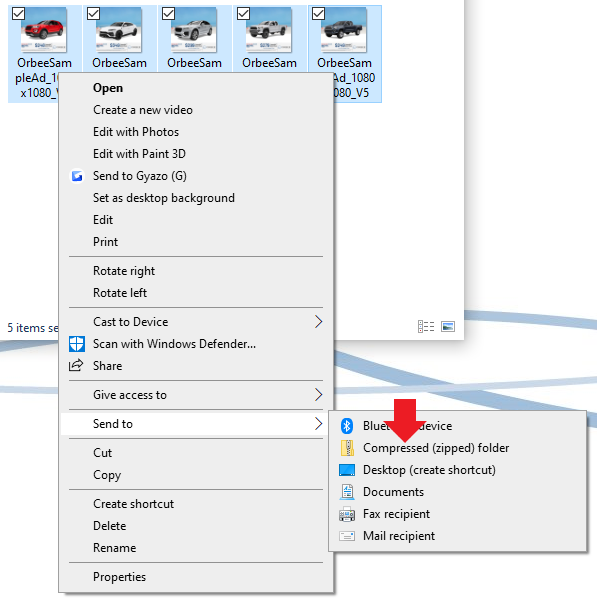
- Once you have selected these files, right-click and select Send to > Compressed (zipped) folder.

- You should see a new file that is titled after your selected item that looks like the image below.
 And that's all you need to do! 👍 You can now attach this file in an email or upload it using a file uploader.
Last Updated: Dec 9, 2019 12:10 PM
If you have any more questions, feel free to contact us at Orbee!
